Pitbike 4-Stroke Single Top End Assembly Guide
Important Considerations
When assembling your Pitbike's 4-stroke single top end, consider the following expert tips:
- Gasket Thickness: Some big bore kits feature head and base gaskets that are thinner than the standard ones. In such cases, refrain from using the stock "O" rings. Instead, apply a thin layer of Yamaha bond or Honda4 semi-drying adhesive for optimal sealing.
Flywheel and Camshaft Alignment
- Flywheel Positioning: Set your flywheel to the "T" mark, indicating top dead center.
- Cam Sprocket Alignment: Align the top cam sprocket mark to the 9 o'clock position.
Valve Lash Adjustment
Recommended Settings
- KLX110, Honda 50-70, China 50-190, Daytona 190: Adjust the valve tappets to 0.003" for both intake and exhaust.
Race Heads & Camshafts
- Valve Lash Settings: Intake 0.003" & Exhaust 0.003". This gap between the valve tip and rocker tip is essential as it closes when the engine heats up.
Camshaft Installation
For all applications:
- Install the camshaft with the lobes facing downward or towards the piston. This initial step, combined with aligning the camshaft and crankshaft timing marks, ensures proper engine timing.
Additional Notes
- Cam Mounting: The 2-bolt cam mounting holes are offset drilled, allowing installation in only one orientation, preventing a 180-degree misalignment.
Torque Specifications
- 50-110cc Round Cam Cover Type & Honda 50/70 (6mm studs): Torque the head to 110 in/lbs, run for one heat cycle, then re-torque.
- 125-150cc Round Cam Cover Type & Honda TRX90 (7mm studs): Torque the head to 140 in/lbs, run for one heat cycle, then re-torque.
- KLX110 and KLX Head Type Motors (ZS155, 155HO, YX 150/160): Torque to 16 ft/lbs, run for one heat cycle, then re-torque 8mm studs.
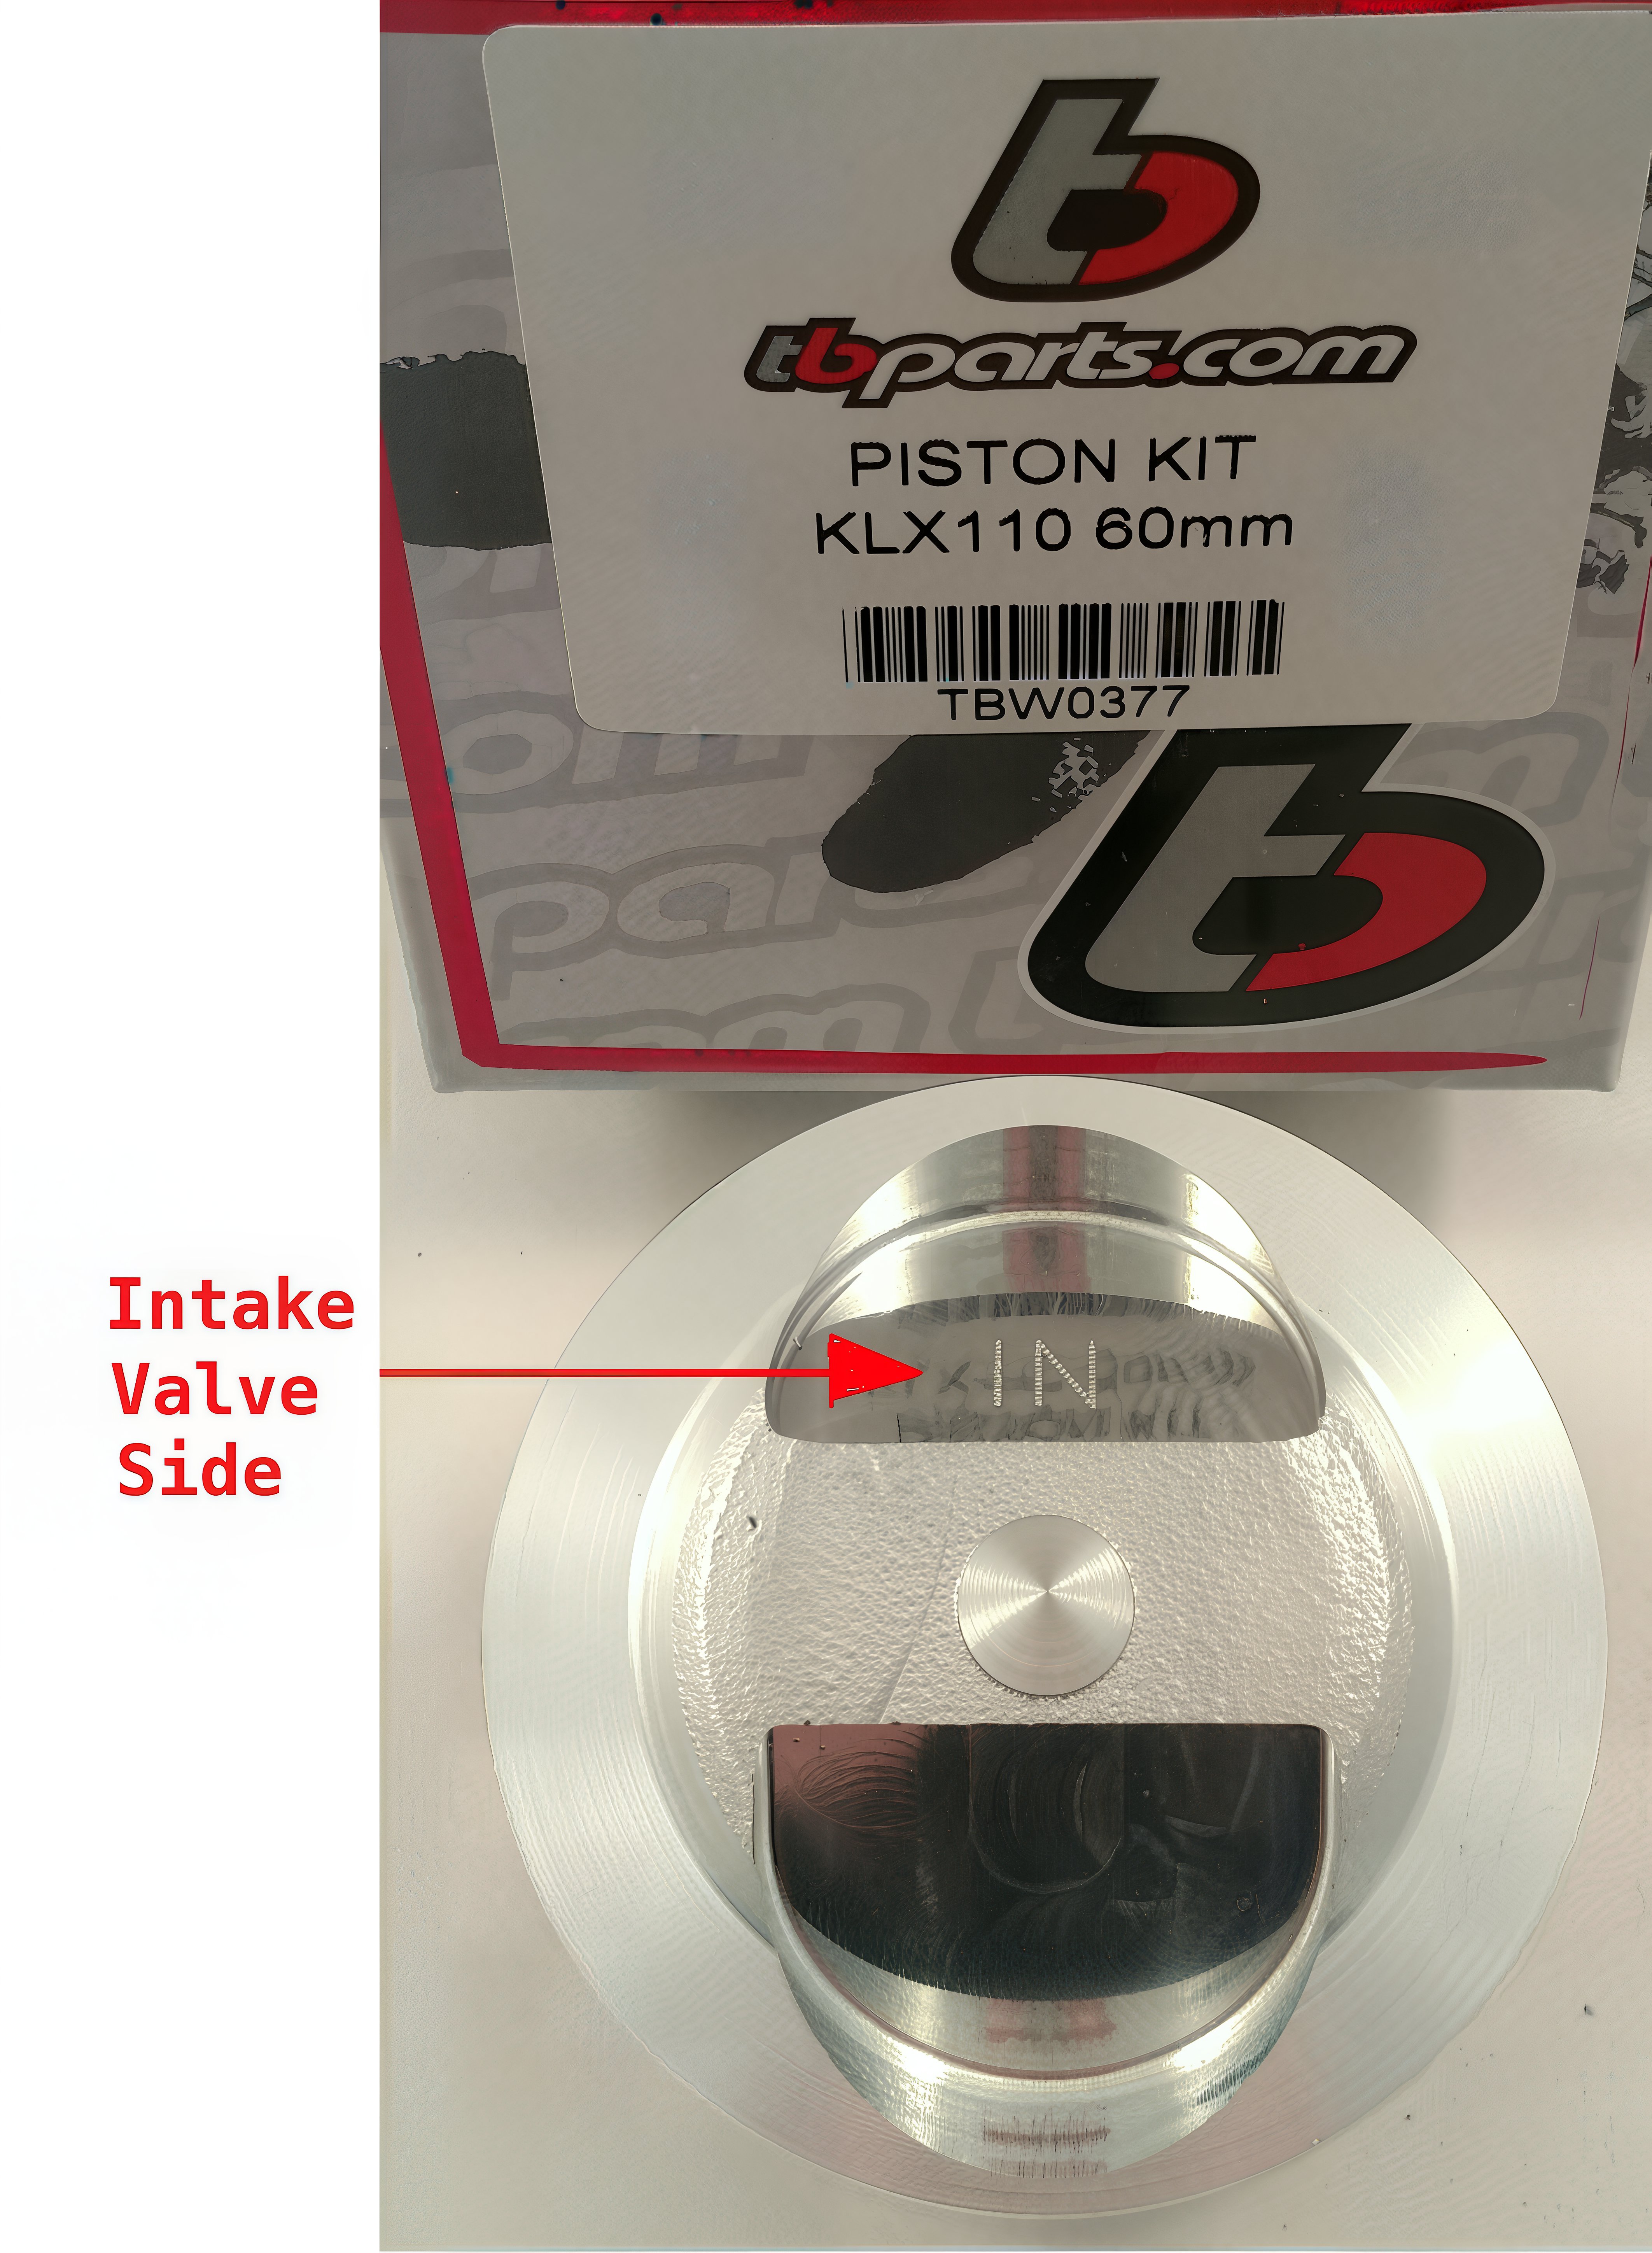
Piston Alignment
To determine the correct piston alignment side, refer to the image below: