Piston Ring Installation Guide
Top to Bottom Assembly
-
Compression Ring: The topmost ring, often with a shiny appearance, is the compression ring. It typically features a dot or letter stamped on it, which should face upwards.
-
Oil Scraper Ring: The middle ring, characterized by its thick black color, is the oil scraper. It also has a dot or letter stamped on it, which should face upwards.
-
Oil Rings: This consists of three components—two thin rings and one ridged (wavy) ring.
Bottom to Top Assembly
-
Expander Ring: Place the wavy expander ring in the lower groove.
-
Lower Oil Ring: Position the lower oil ring beneath the expander ring in the lower groove.
-
Upper Oil Ring: Install the upper oil ring above the expander ring in the lower groove.
-
Middle Ring: Insert the black ring into the center groove.
-
Top Ring: Place the silver ring in the top groove, ensuring the markings on the ring face upwards.
End Gaps
- Set the top ring gap 180 degrees from the wrist pin, then space the gaps evenly at one-third intervals.
- Ensure the end gaps of the piston rings are not aligned with each other to prevent smoking; they should be evenly spaced apart.
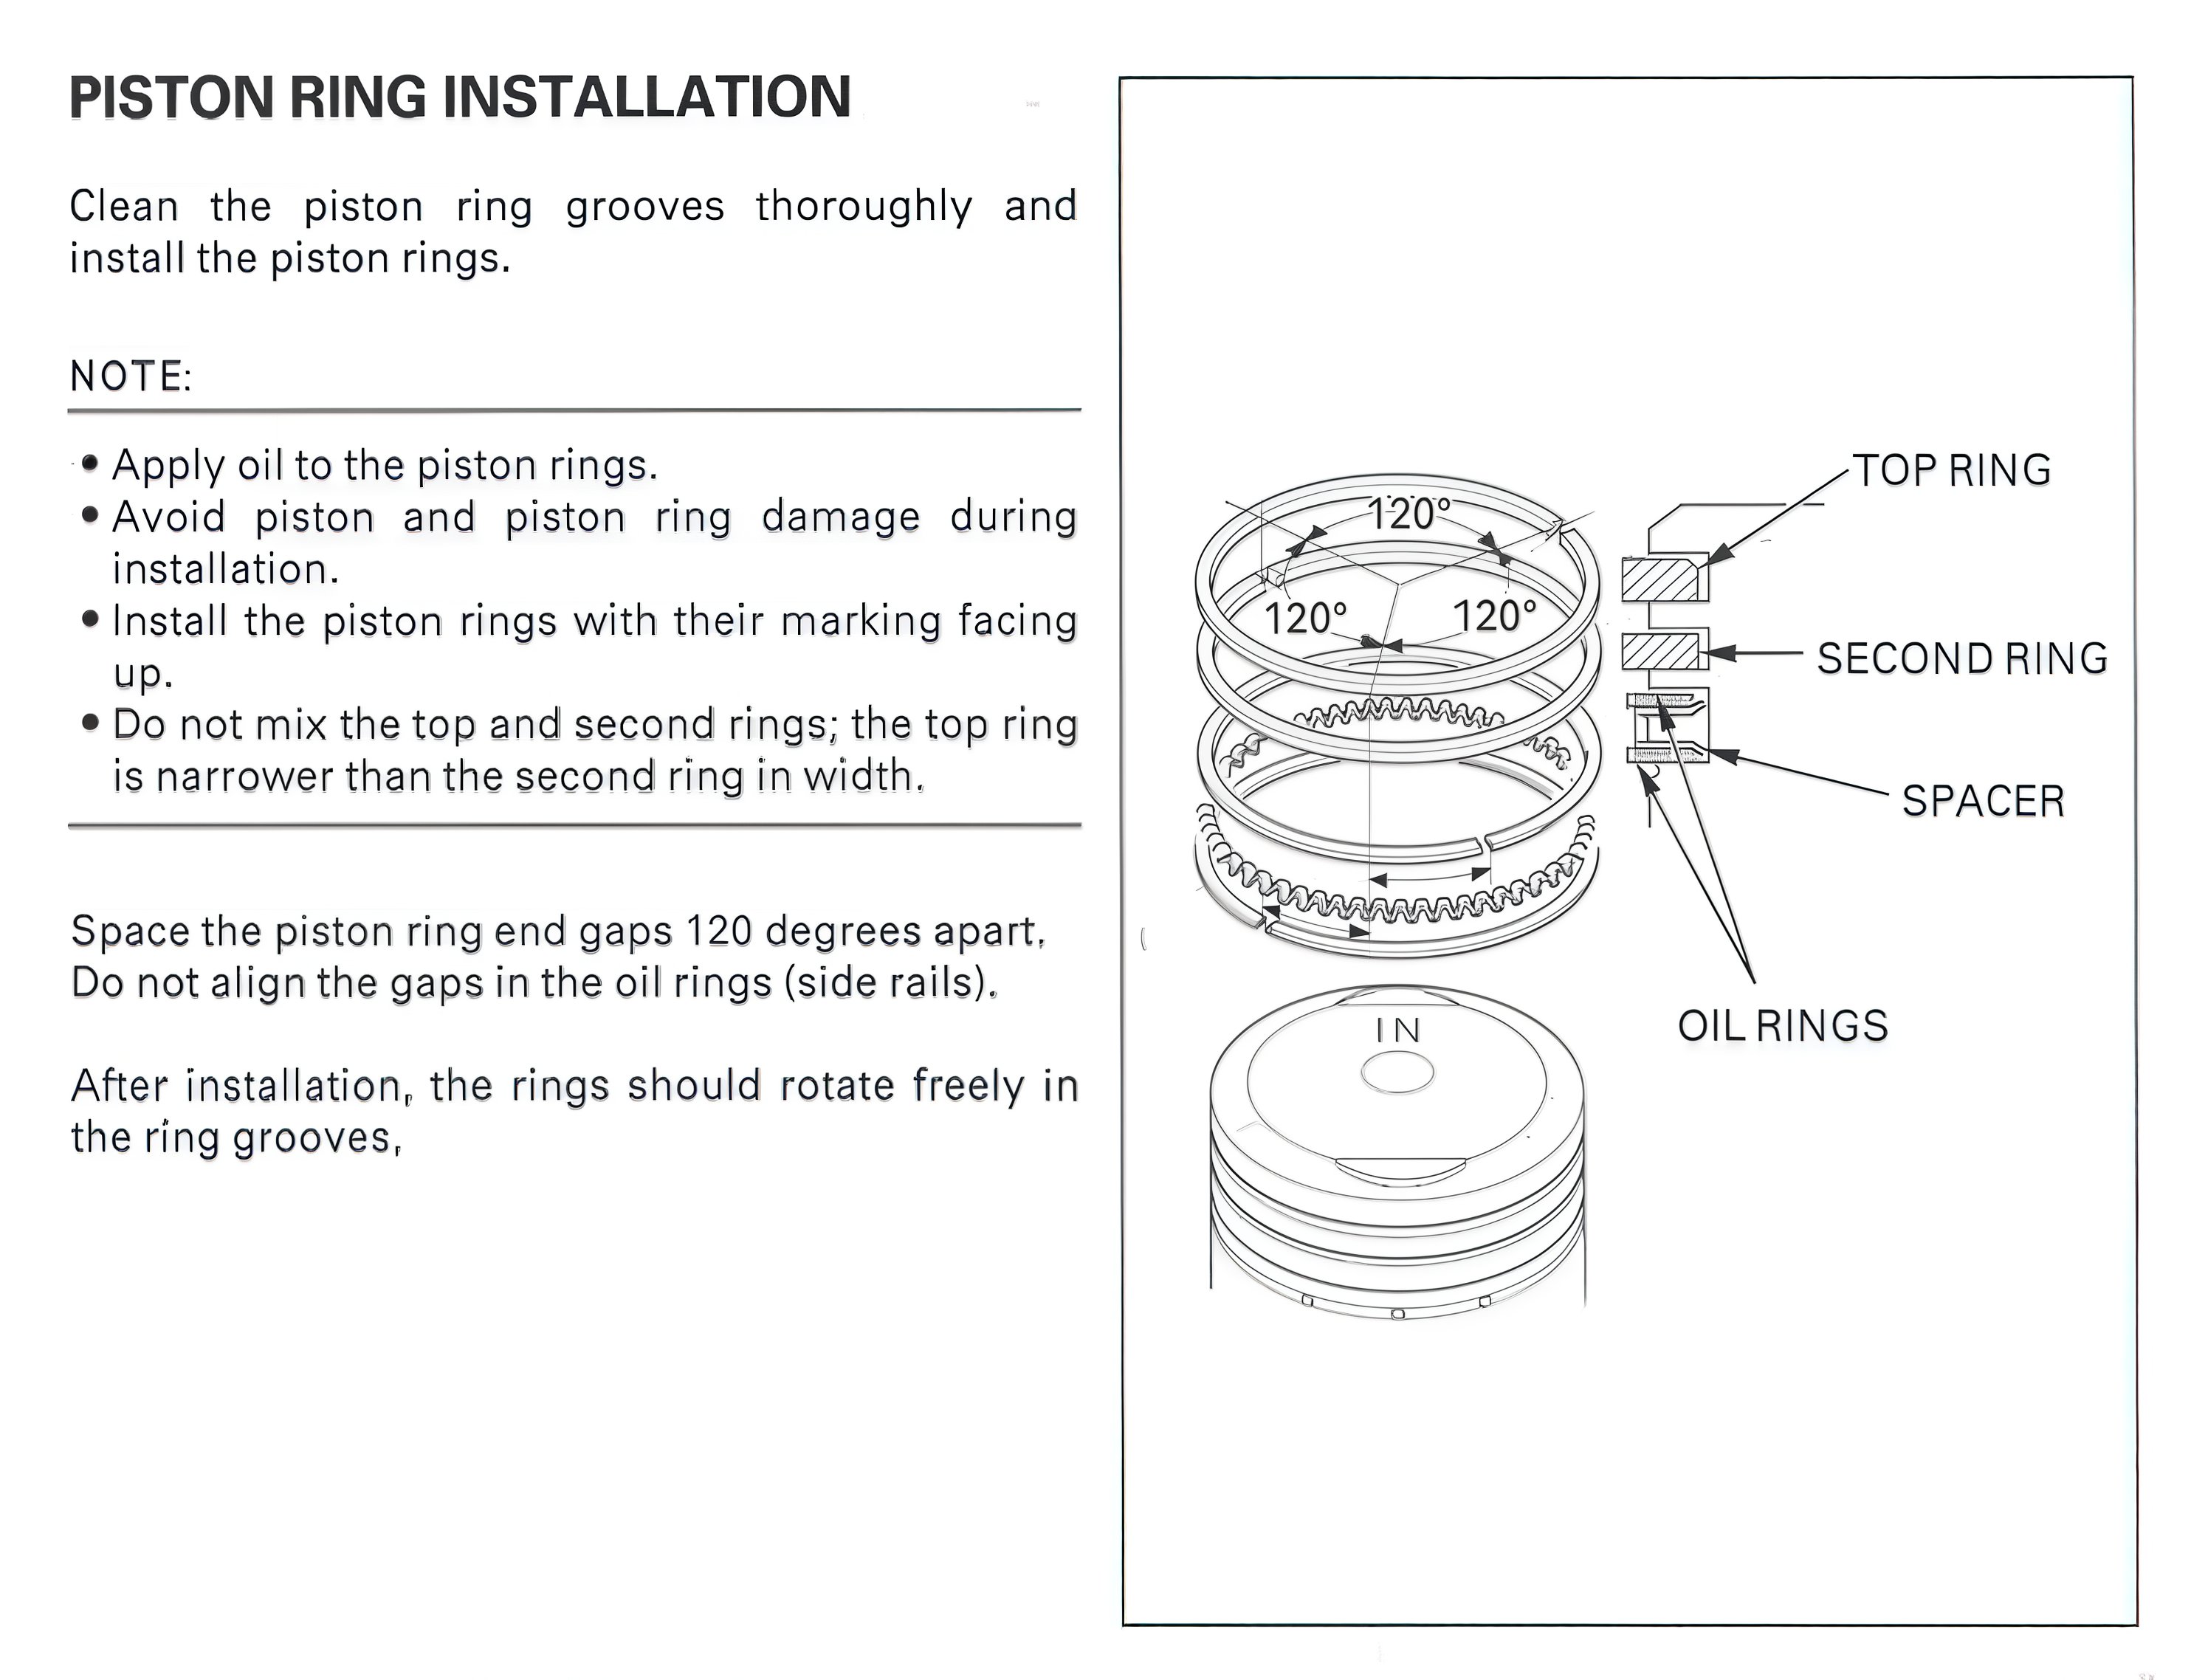
PISTON RING INSTALLATION
Clean the piston ring grooves thoroughly and install the piston rings..
NOTE:
- Apply oil to the piston rings..
- Avoid piston and piston ring damage during installation.
- Install the piston rings with their marking facing up.
- Do not mix the top and second rings; the top ring is narrower than the second ring in width.
Space the piston ring end gaps 120 degrees apart Do not align the gaps in the oil rings (side rails).
After installation, the rings should rotate freely in the ring grooves,.