The Ultimate Pit Bike for Stunt Riding
Meet Anton Bocharov, Almaty, 34 years old
I stumbled into stunting by accident, initially just wanting to ride around the city on a motard, specifically a pit motard. My first pit bike was a purchase from China, fitted with a vertical ZongSheng engine of 150 cc, and motard wheels. However, the wheels were 14/17 with tires more suited for a cart—utter rubbish. A single ride through the countryside sparked a project to upgrade. With that, enhancements began: a front 12-inch wheel crafted from a light alloy disk, and a 13-inch rear wheel similarly constructed. The front brake disk was enhanced to a 220 mm diameter, while the rear stock remained at 190 mm. Front was fitted with a dual-piston caliper. Thus, the stunt bike was completed and I rode it. I mastered wheelies and could stop for 15 to 20 meters, even in the cold! It became apparent that this bike was inadequate for burnouts, lacked engine explosiveness, and reliability of all components was wanting.
The Chief Concern
LACK OF BRAKES!
The cardinal rule is the more responsive the brakes, the quicker and more complex stunts you can accomplish. "Ignore those who declare: 'You’ll kill yourself with such powerful brakes… you’ll squeeze too hard or something.'" Far quicker to meet an end without brakes. Learning to delicately manage the brakes with fingertip precision is a skill everyone can master. Thus, the conclusion was drawn—it was time to construct a bike according to my personal desires and demands.
Building Pit Number Two
Frame
For stunt riding, an extended rear swingarm could remain, but motards need to tackle curbs, and here, the height and overall length of the pit bike base are extremely important. Why? Because, first and foremost, the crankcase would suffer damage!
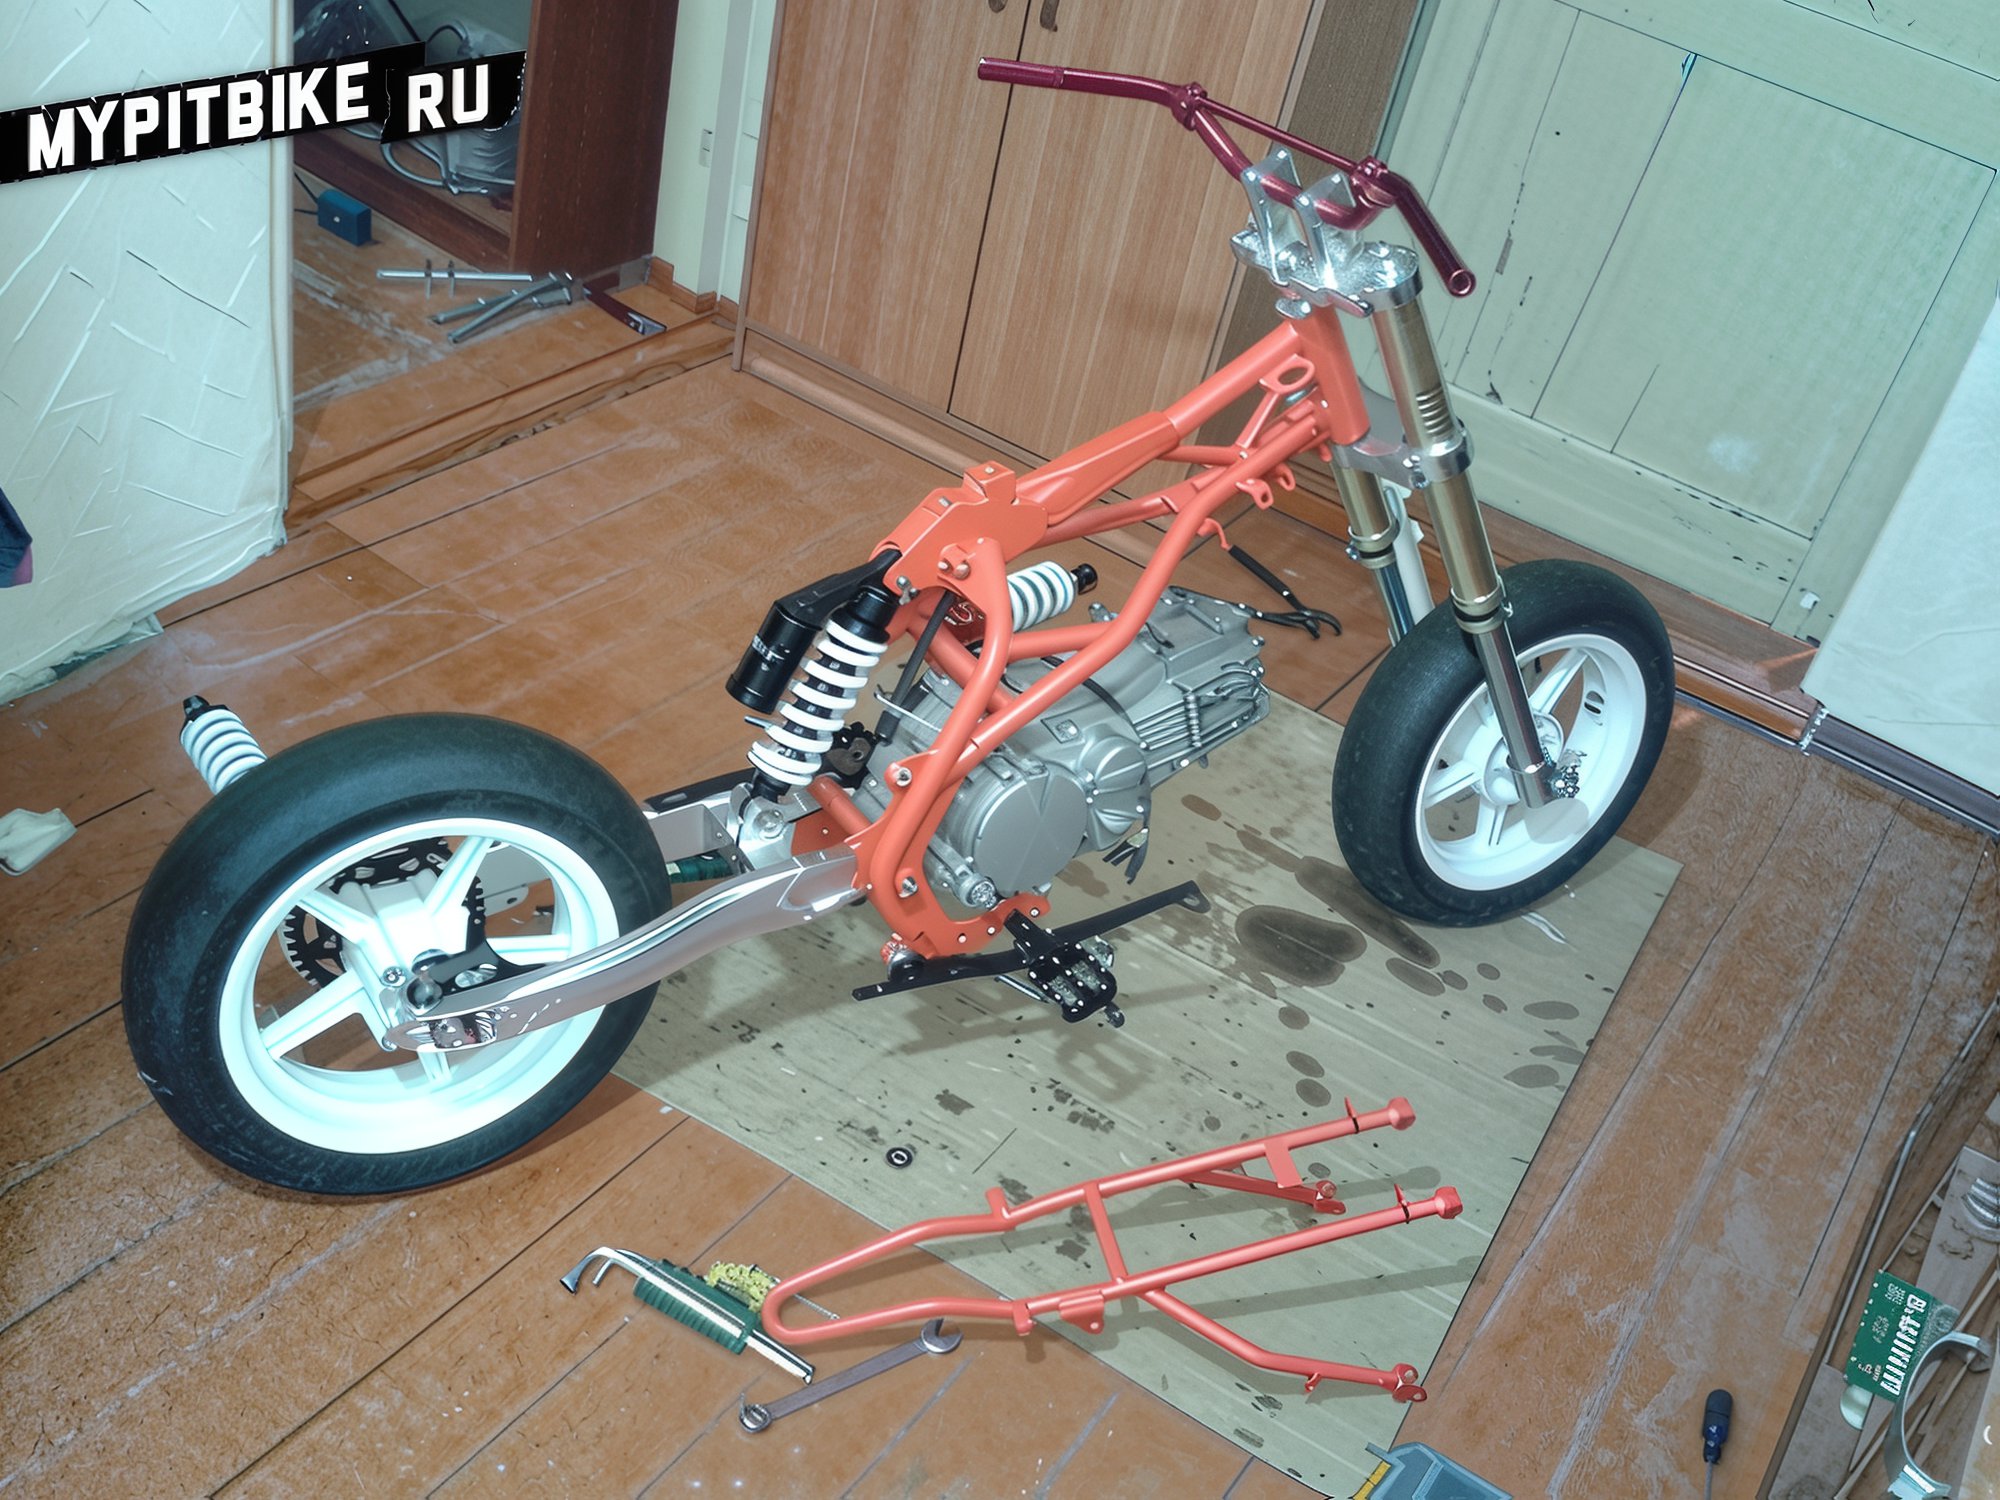
Experienced pit riders will notice immediately—this pit is as stretched as a dachshund or a chopper. I didn’t anticipate this myself. This was due to a shock absorber ordered at 280 mm (measuring from the center of the lower to the upper hole). The swingarm was designed for 12/14-inch wheels. Upon installation, this issue was revealed and resolved by modifying the mounting location of the shock’s ear to the frame.
Swingarm
It must be aluminum. This provides a light weight and, with significantly thicker swingarm walls, strength! Resilient against impacts, torsion, and springiness. In the swingarm, there shouldn’t be any bushings—only bearings. Two bearings are inserted on each side. Washers are installed between the frame and the swingarm, effectively eliminating all play and the possibility of its appearance. But this is no panacea—after every ride, inspect for play. This extends the lifespan of components and bearings, aiding in quicker rear-wheel riding.
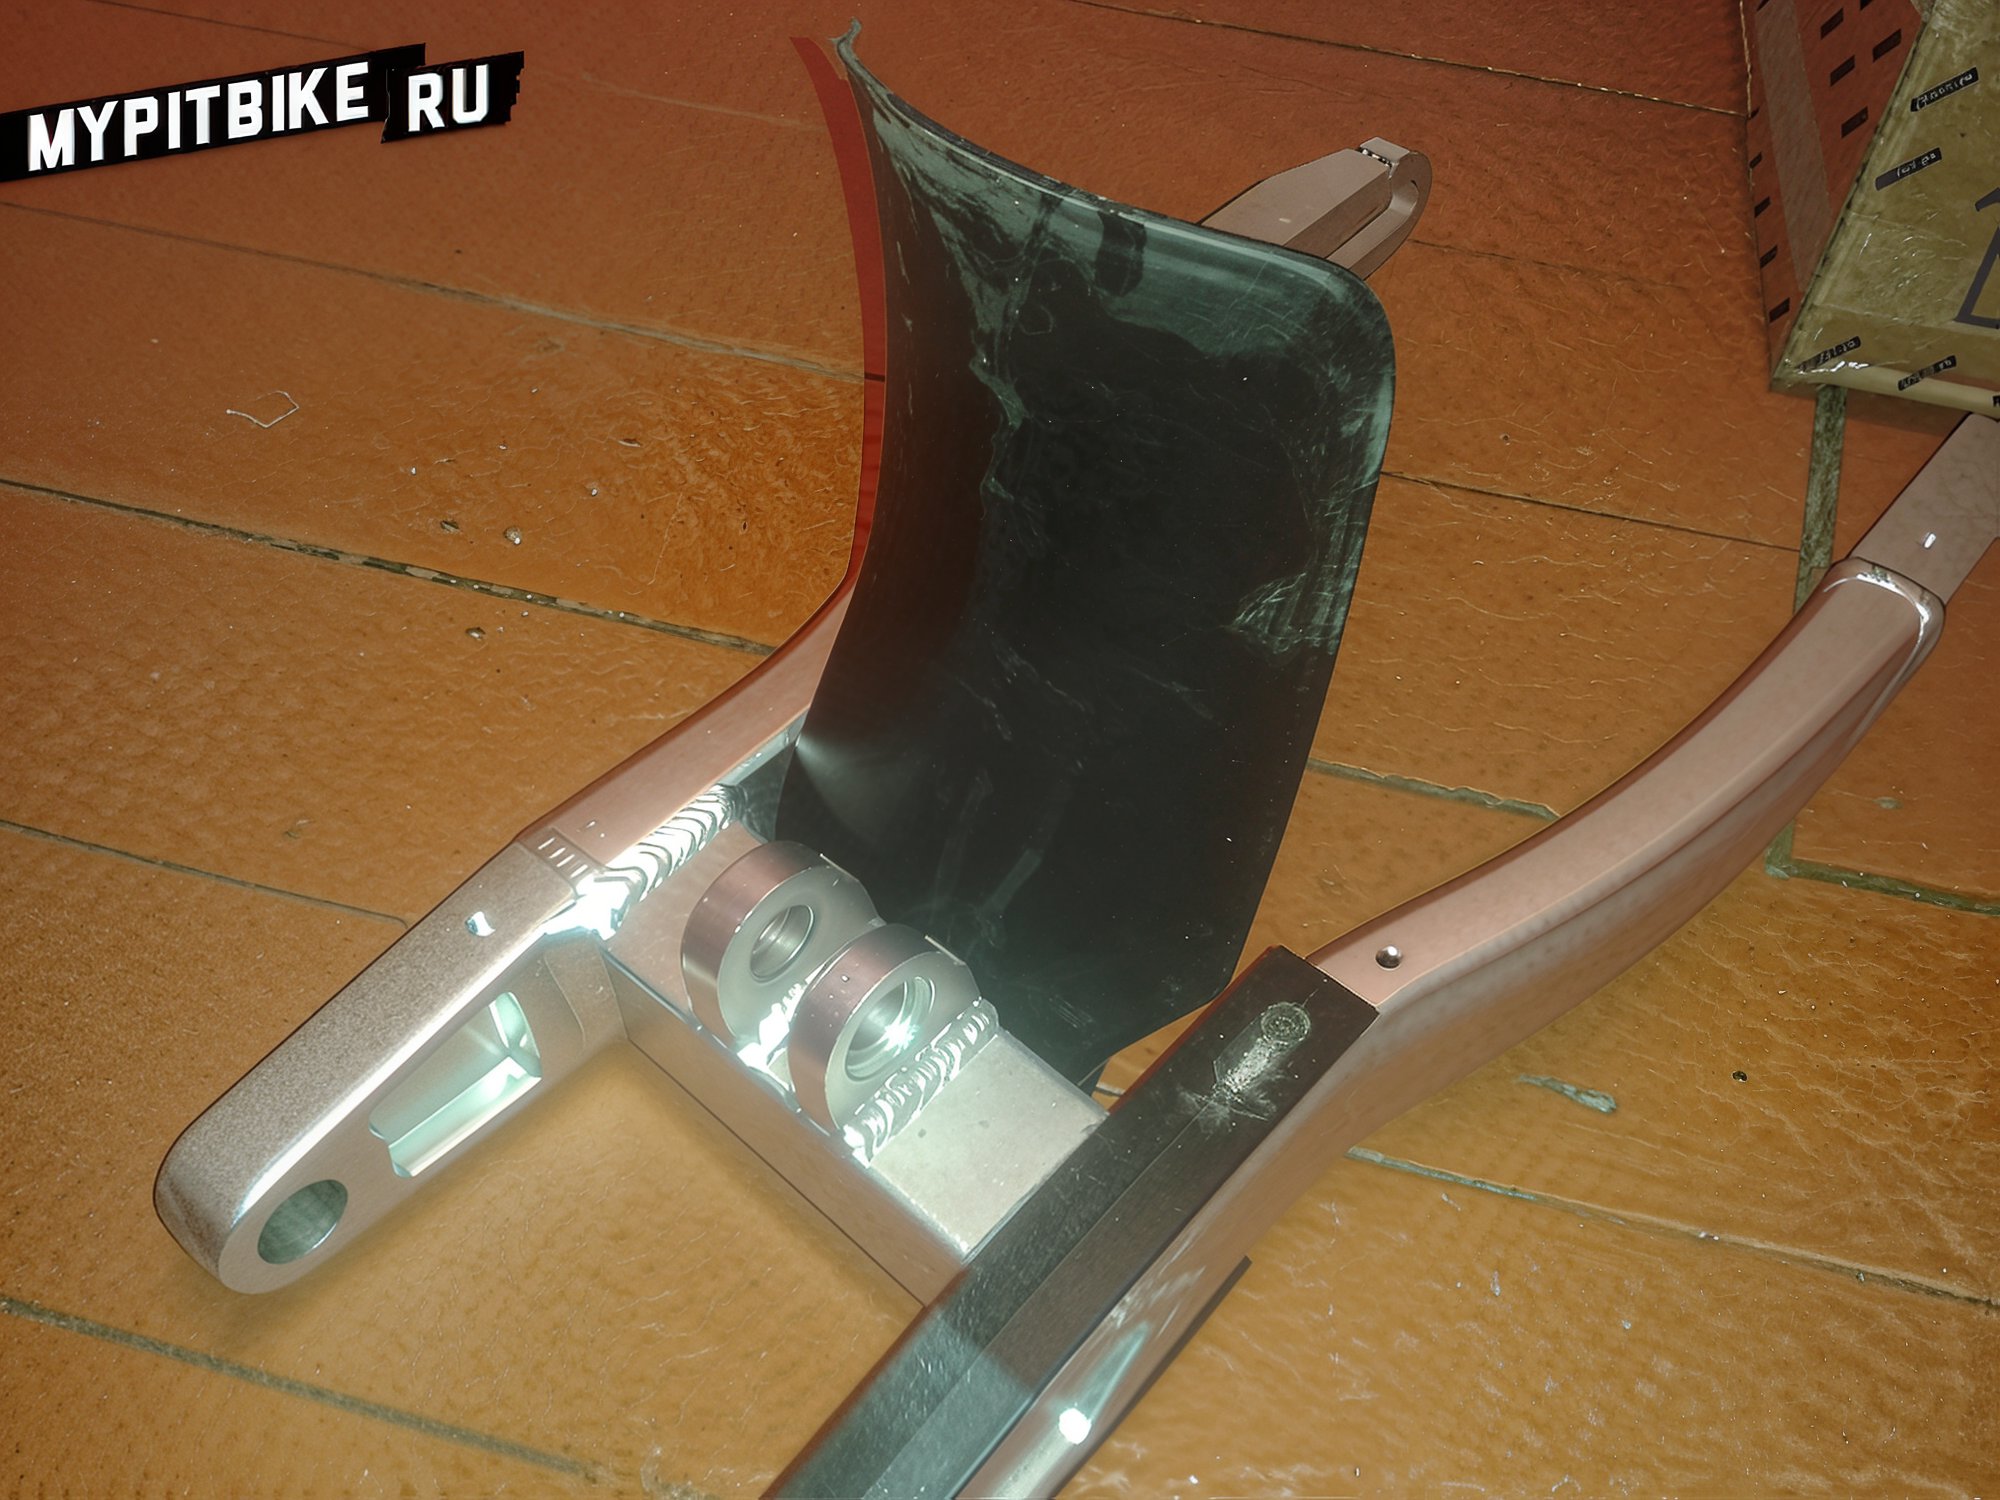
A chain protection is attached into a thread I crafted myself. First, a hole is drilled, then threaded with a tap, and conical bolts are screwed in from both sides. The bolts are set in place with thread-locking adhesive to prevent loosening from vibration and chain impact.
Installing the Shock Absorber Guard
Someone might call it a gimmick—forget them. Because I won’t be dressing the shock in a cover; the bike is urban, and besides, the shock, beautiful with compression and rebound adjustments, should defend itself against water, dust, and dirt better than being encased. In conclusion, for motocross, it might not be necessary to install bearings instead of bushings, but in stunt riding: "The fewer the play, the easier it is to learn balance on the bike!"
Rear Shock Absorber
Simple yet focused on quality, the Fastace - top series, measuring 280 mm. Aims for an aesthetically pleasing, effective result. For beginners in stunting, the shock is fully tightened, on compression and rebound. The spring is also maximally tightened to facilitate rear-wheel rides by eliminating damping and resultant "bouncing" effects. The length is chosen as motards require less suspension travel than cross-country bikes. The photo shows adjustable compression, rebound, and air-bleed capabilities (indicator No. 3). At the time of purchase, it was priced around 400 USD or 32,000 rubles.
Front Fork
The brand escapes me, priced around 600 USD with eBay delivery. Naturally, an inverted fork with a 38 mm diameter and 735 mm length. Since this stunt pit sits on motard wheels, the fork travel should be longer to endure less impact during a "stoppy." Mounting to triples is a standard 45/48. The setup includes compression and rebound adjustments and its internals are identical to a 2006 and new R6 fork. Special tools are required for disassembly, which I ordered from a machinist.
Handlebars, Or Rather, Handlebar Choices
Yet undecided on which would be more convenient for riding. Mounted currently, a low handlebar. Strong constructed from aviation-grade aluminum with wall thicknesses of 5 to 7 mm—robust enough not to bend upon falling and to protect other bike components from damage. Standard motard handlebar width of 82 cm ensures comfortable handling and ample space for all pit control levers.
Returning to the Frame
Once all peg mounts and other stunt gear attachment points were measured, the frame was stripped and painted a vibrant orange plus several layers of lacquer. Then, reassembly followed.
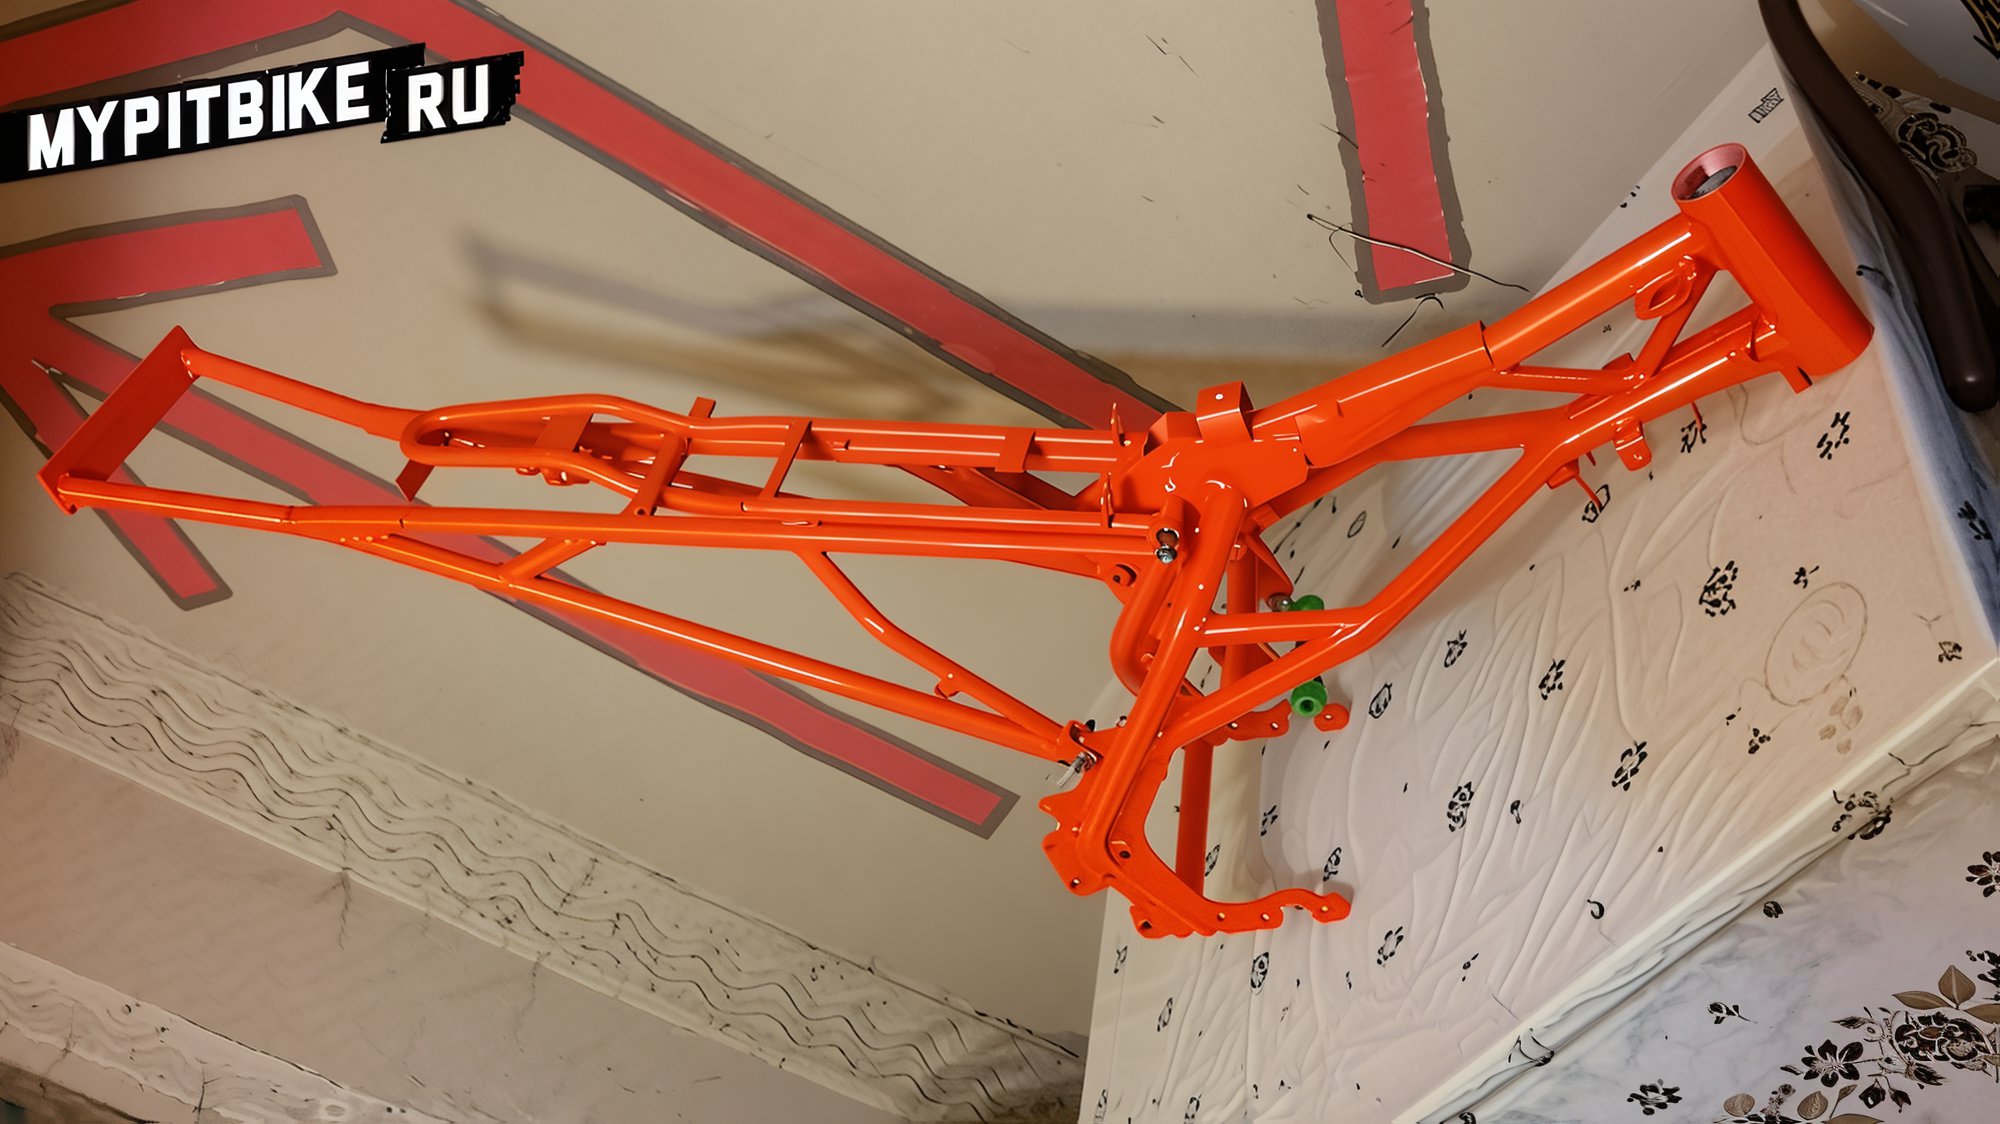
Note: No peg mounts are visible, owing to my plan to use pegs with mounts—attached to a subframe tube. A friend opted for welded peg mounts, thus a non-detachable configuration.
Engine
Craving more power than the previously owned 150 cc pit bike, I opted for a 160 cc, but with an "upgraded" head—four valves. An evocative name: DEVIL. Bold, right? Additional tuning was minimal—just a lightweight gear shift pedal and a transparent engine cover on the magneto side.
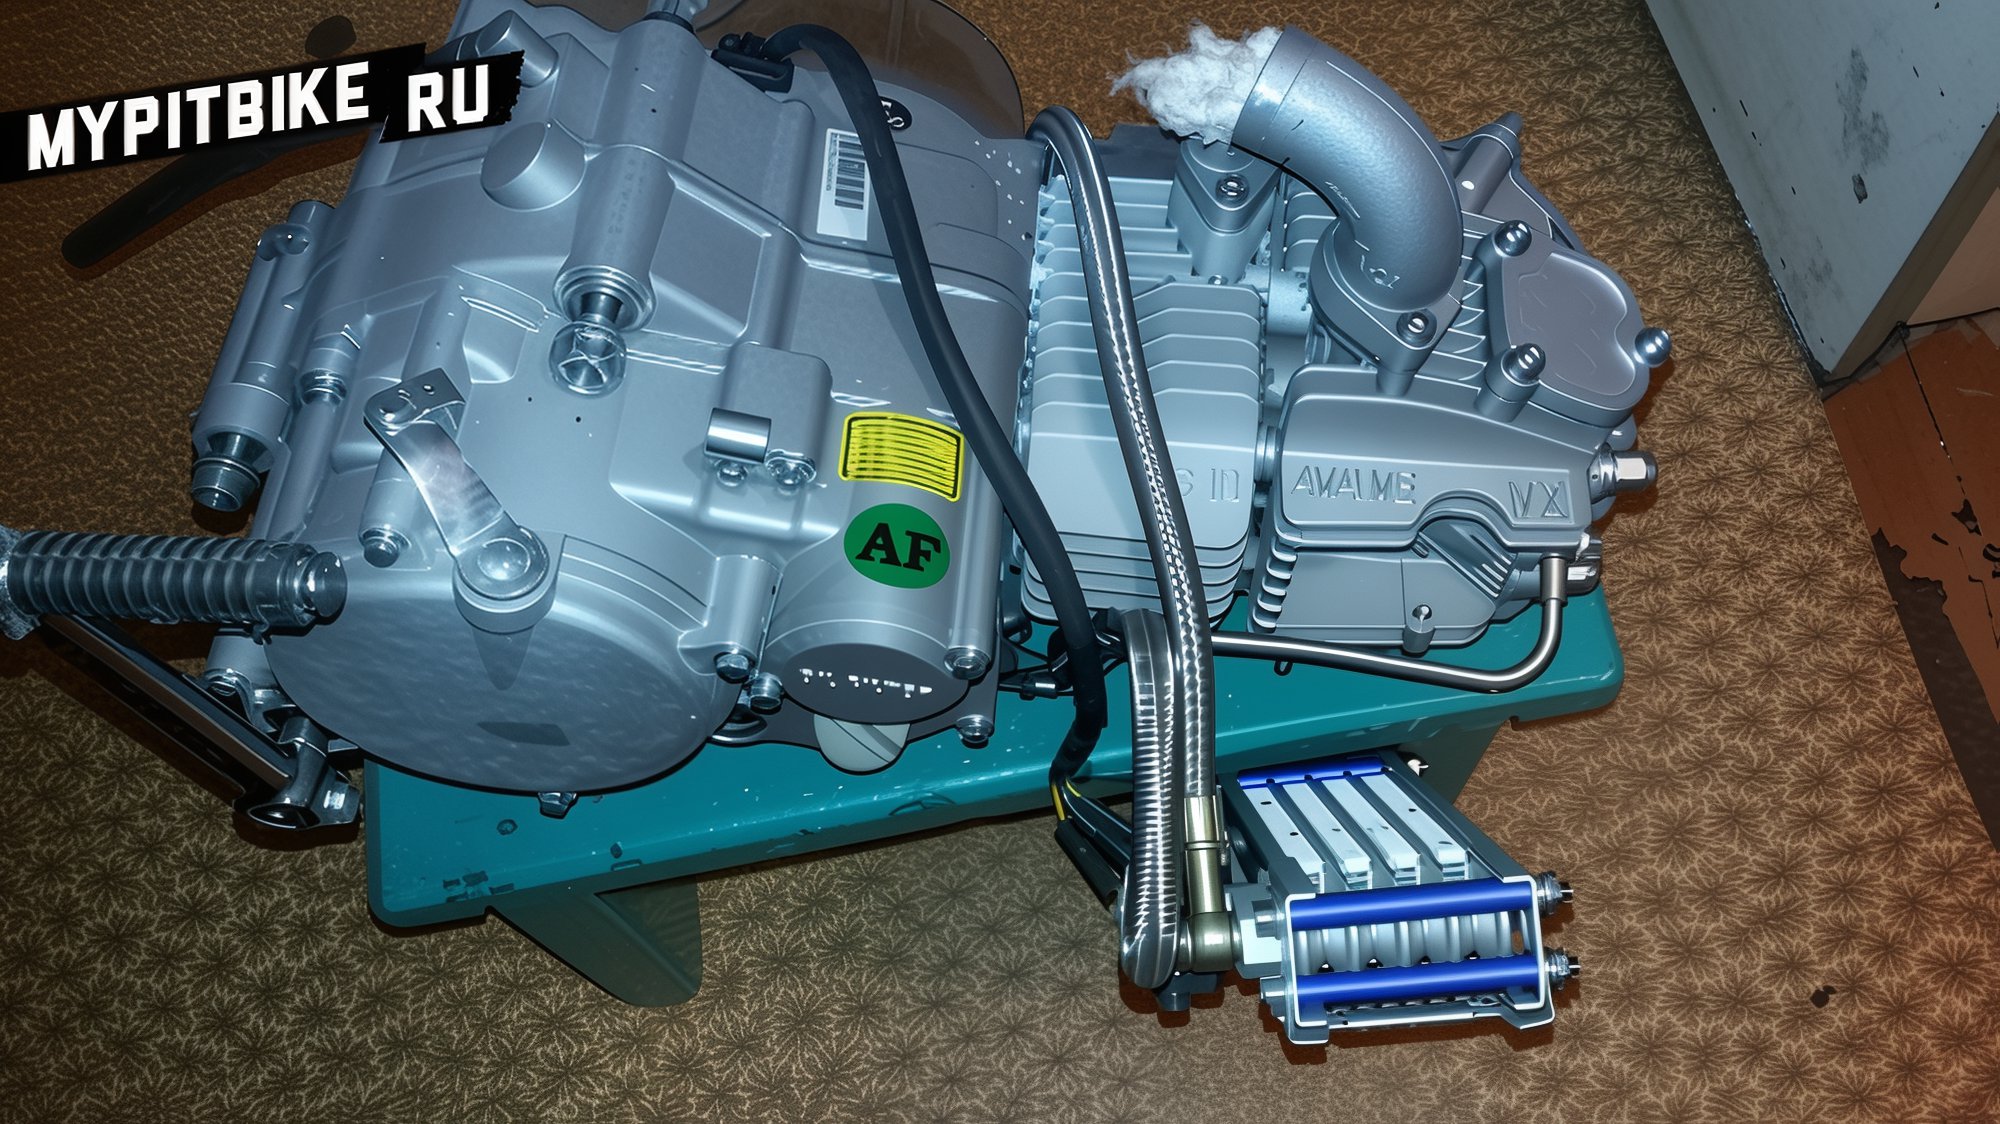
Valves clearances were checked and adjusted, with shims of 7.48 size—the standard size in motorcycle engines. Oil was changed to a Bardahl 10W60 blend. Installed a magnetic drain plug. Factory-installed metal filters can be cleaned and reused, but I ordered standard paper filter elements too.
Carburetor
Purchased a Taiwanese replica of a Keihin carburetor. Perhaps it's the real deal. The negotiations claimed it was a Japanese carburetor with a tuning atelier insignia: TwLP. Allegedly, a written agreement was made with Japan. The quality inspires confidence, flawless without a single burr or defect, which delighted me. Air regulates idle fuel adjustment, with jets handling medium and high RPM. Importantly, this is not a 28-carburetor but a 30-mm one! While it may not boost the low-end, top RPMs will reveal the engine’s potential. Especially with the carb adjusting to an upgraded exhaust system, enlarged to 38 mm plus a megabomb, designed by the aforementioned Taiwanese company, specifically for horizontal engines 160 cc and above.

Jets: Mid-range 40, high-range 110—a standard for initial carb tuning for a 160 cc engine.
Coil, CDI, Wiring
Wired the system myself, discarding weak wires in favor of quality, heat-resistant ones, before bundling them in tape. The loom powers only the engine; separate wires will lead to lights and gauges. The coil was shipped with a tuned CDI, featuring advance adjustment in real time. Set up using an NGK plug wire purchased in Japan, initially equipped with a resistor which I omitted in light of the specialized CDI. A curious note: this coil is grounded negative, unlike standard coils which ground positive.
Front Fork and a Word on Brakes
Forks mentioned previously at 38 mm with 10W universal oil—thicker oil wasn't available—standing at 735 mm. Here are your visuals:
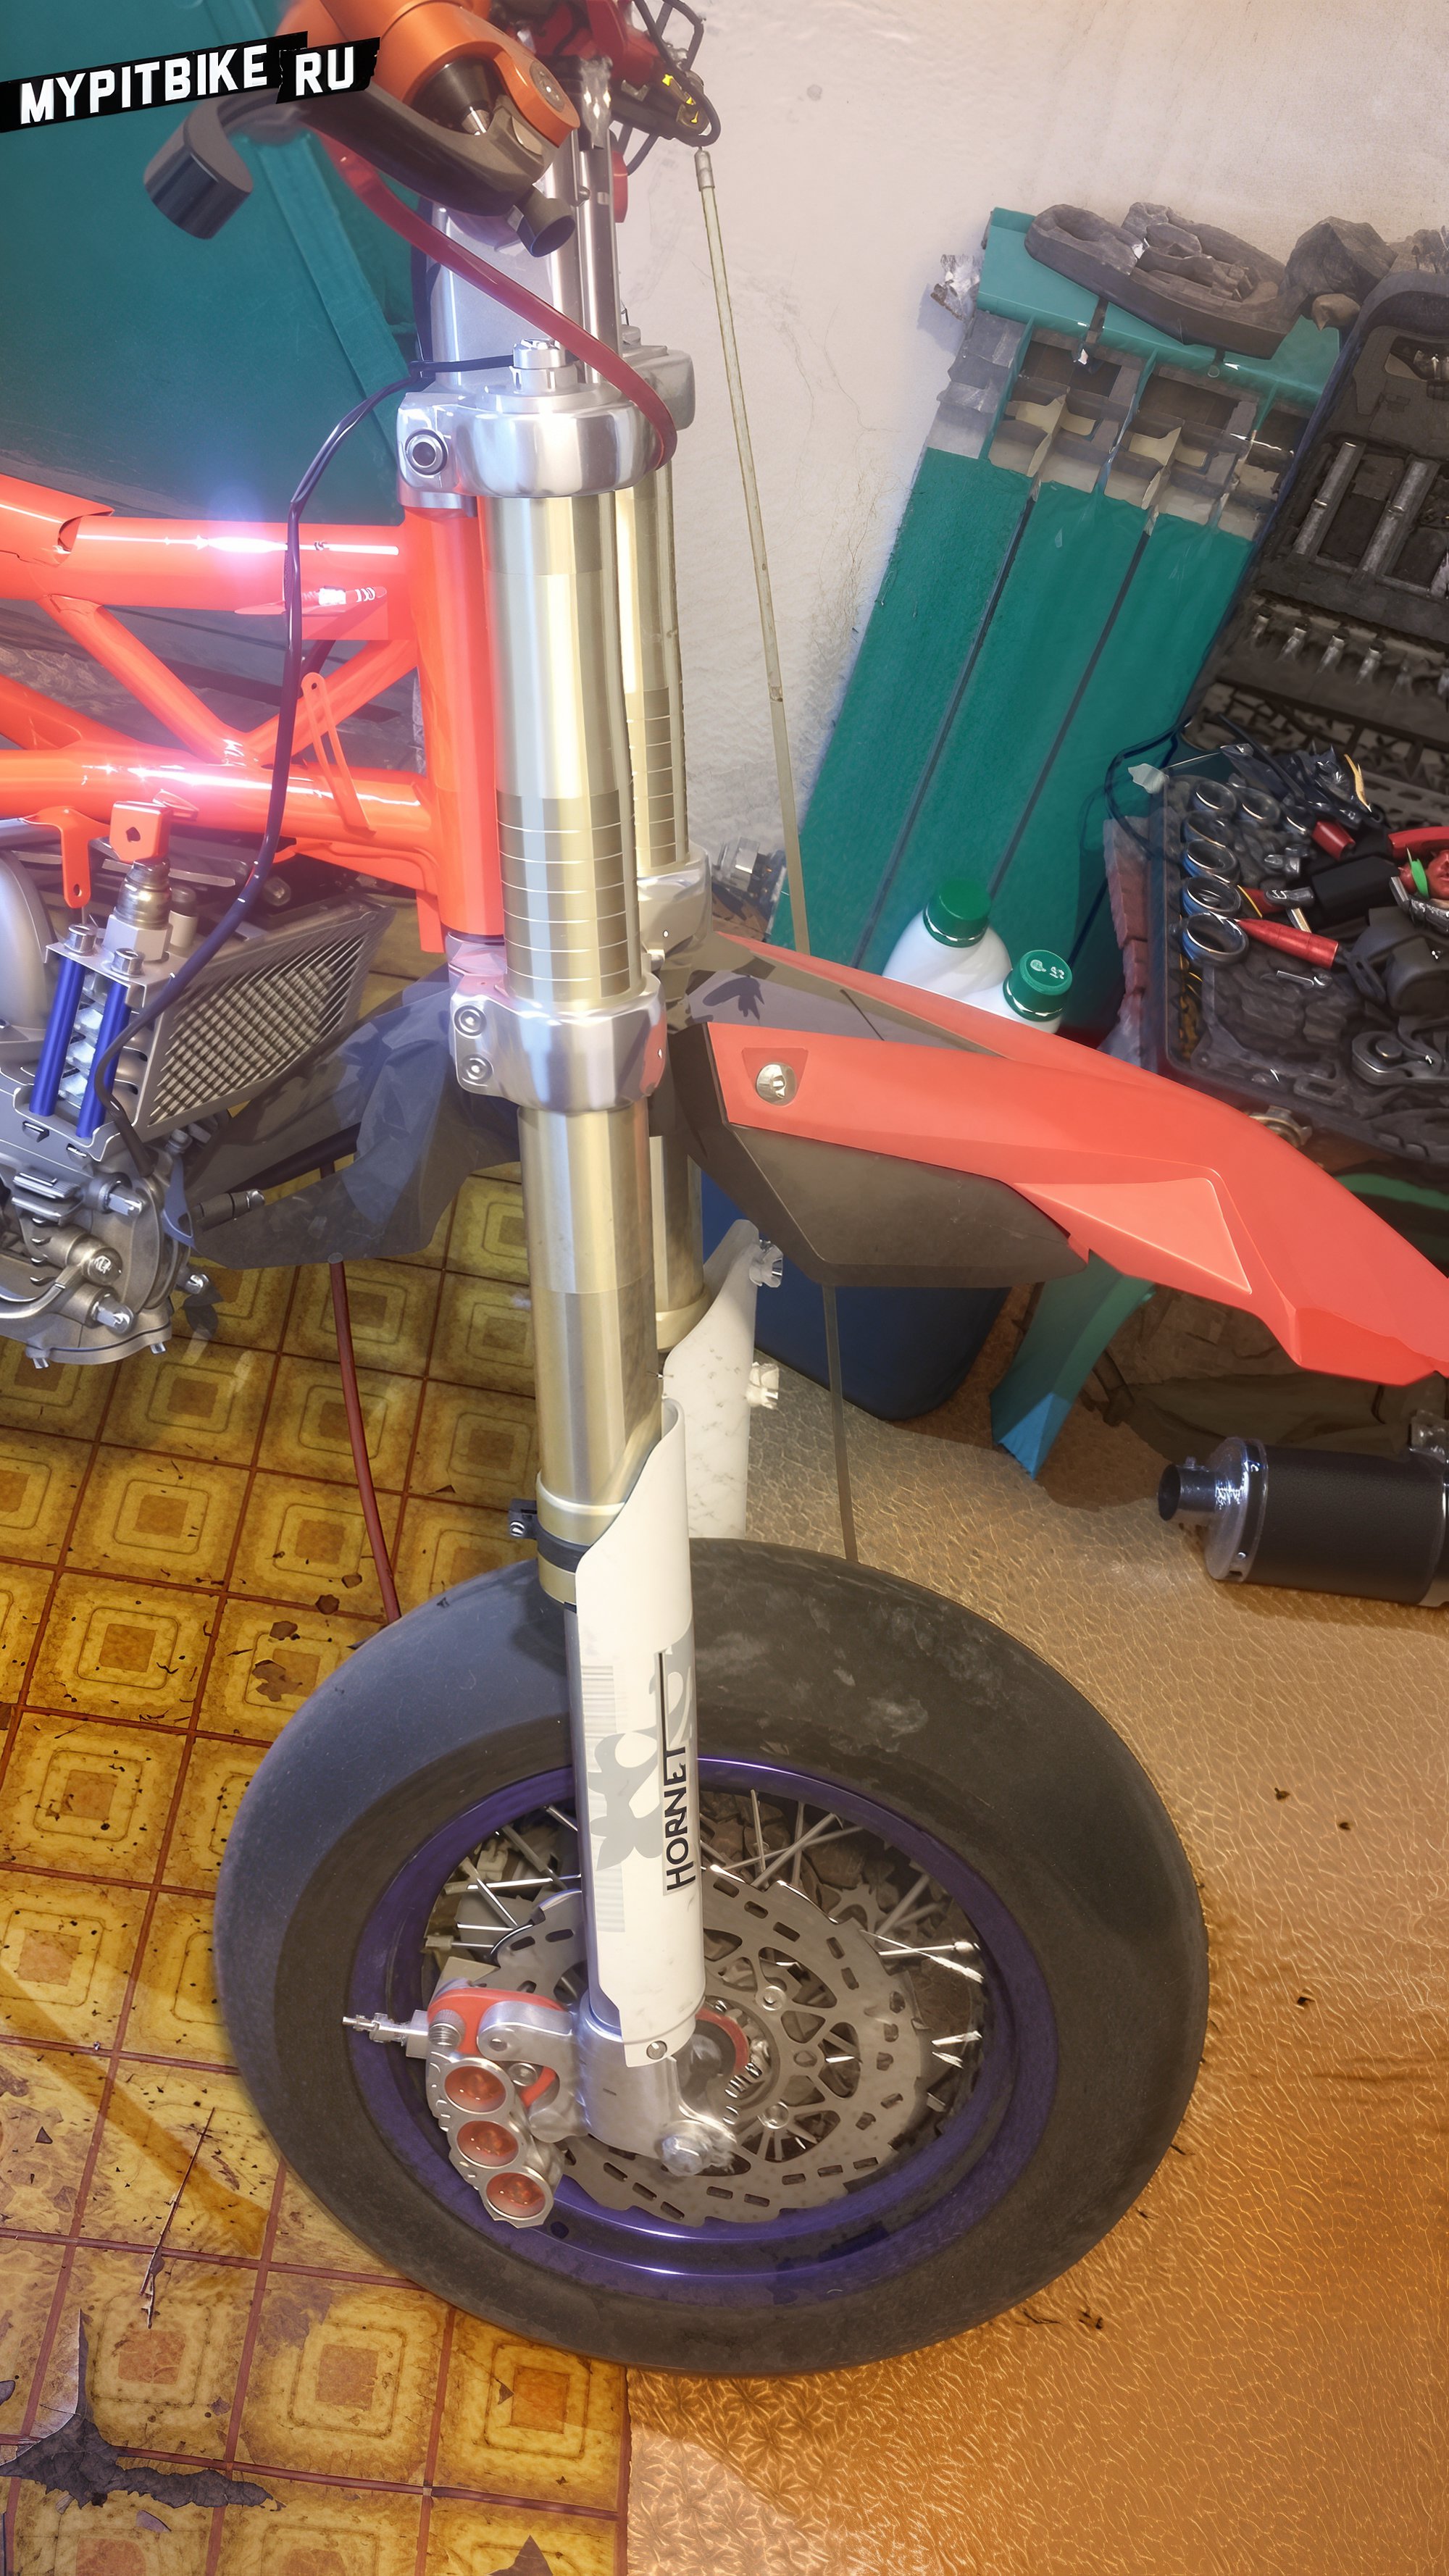
As for brakes, they are formidable: discs increased to 220 mm with two six-piston calipers installed. One will be removed, serving only for show on initial rides; it may eventually prove useful in engine tuning on the track. The front wheel width spans 3.5 inches with tires scaled at 120 width, only slight trimming required for fork guards as they clear the forks.